Bancs en ski/en
Tuto — Difficulté : Moyen — Durée : 6 hour(s) — Coût : 5 EUR — Mise à jour : 28 mai 2026 — 53 révision(s) — Licence : Attribution (CC BY)
Aires : Habitat — Contributeurs : EKO!, FuzzyBot
Fiche reformulée à partir du wiki Low-tech Lab : voir la fiche originale ↗
Versions de cette fiche : AR EN EO ES FA FR TI
Introduction
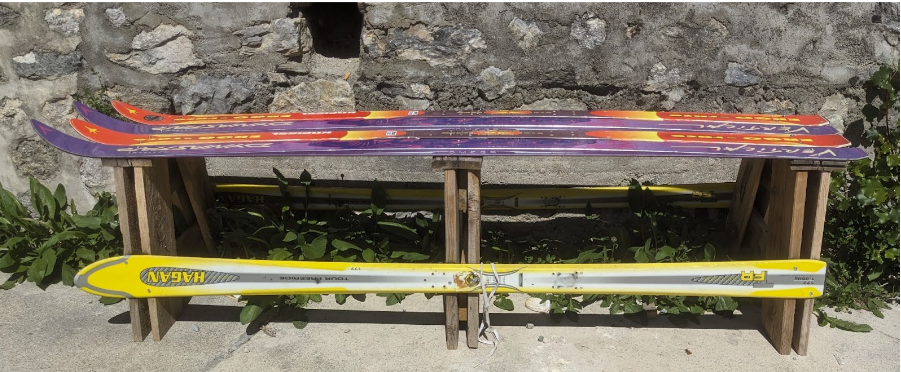
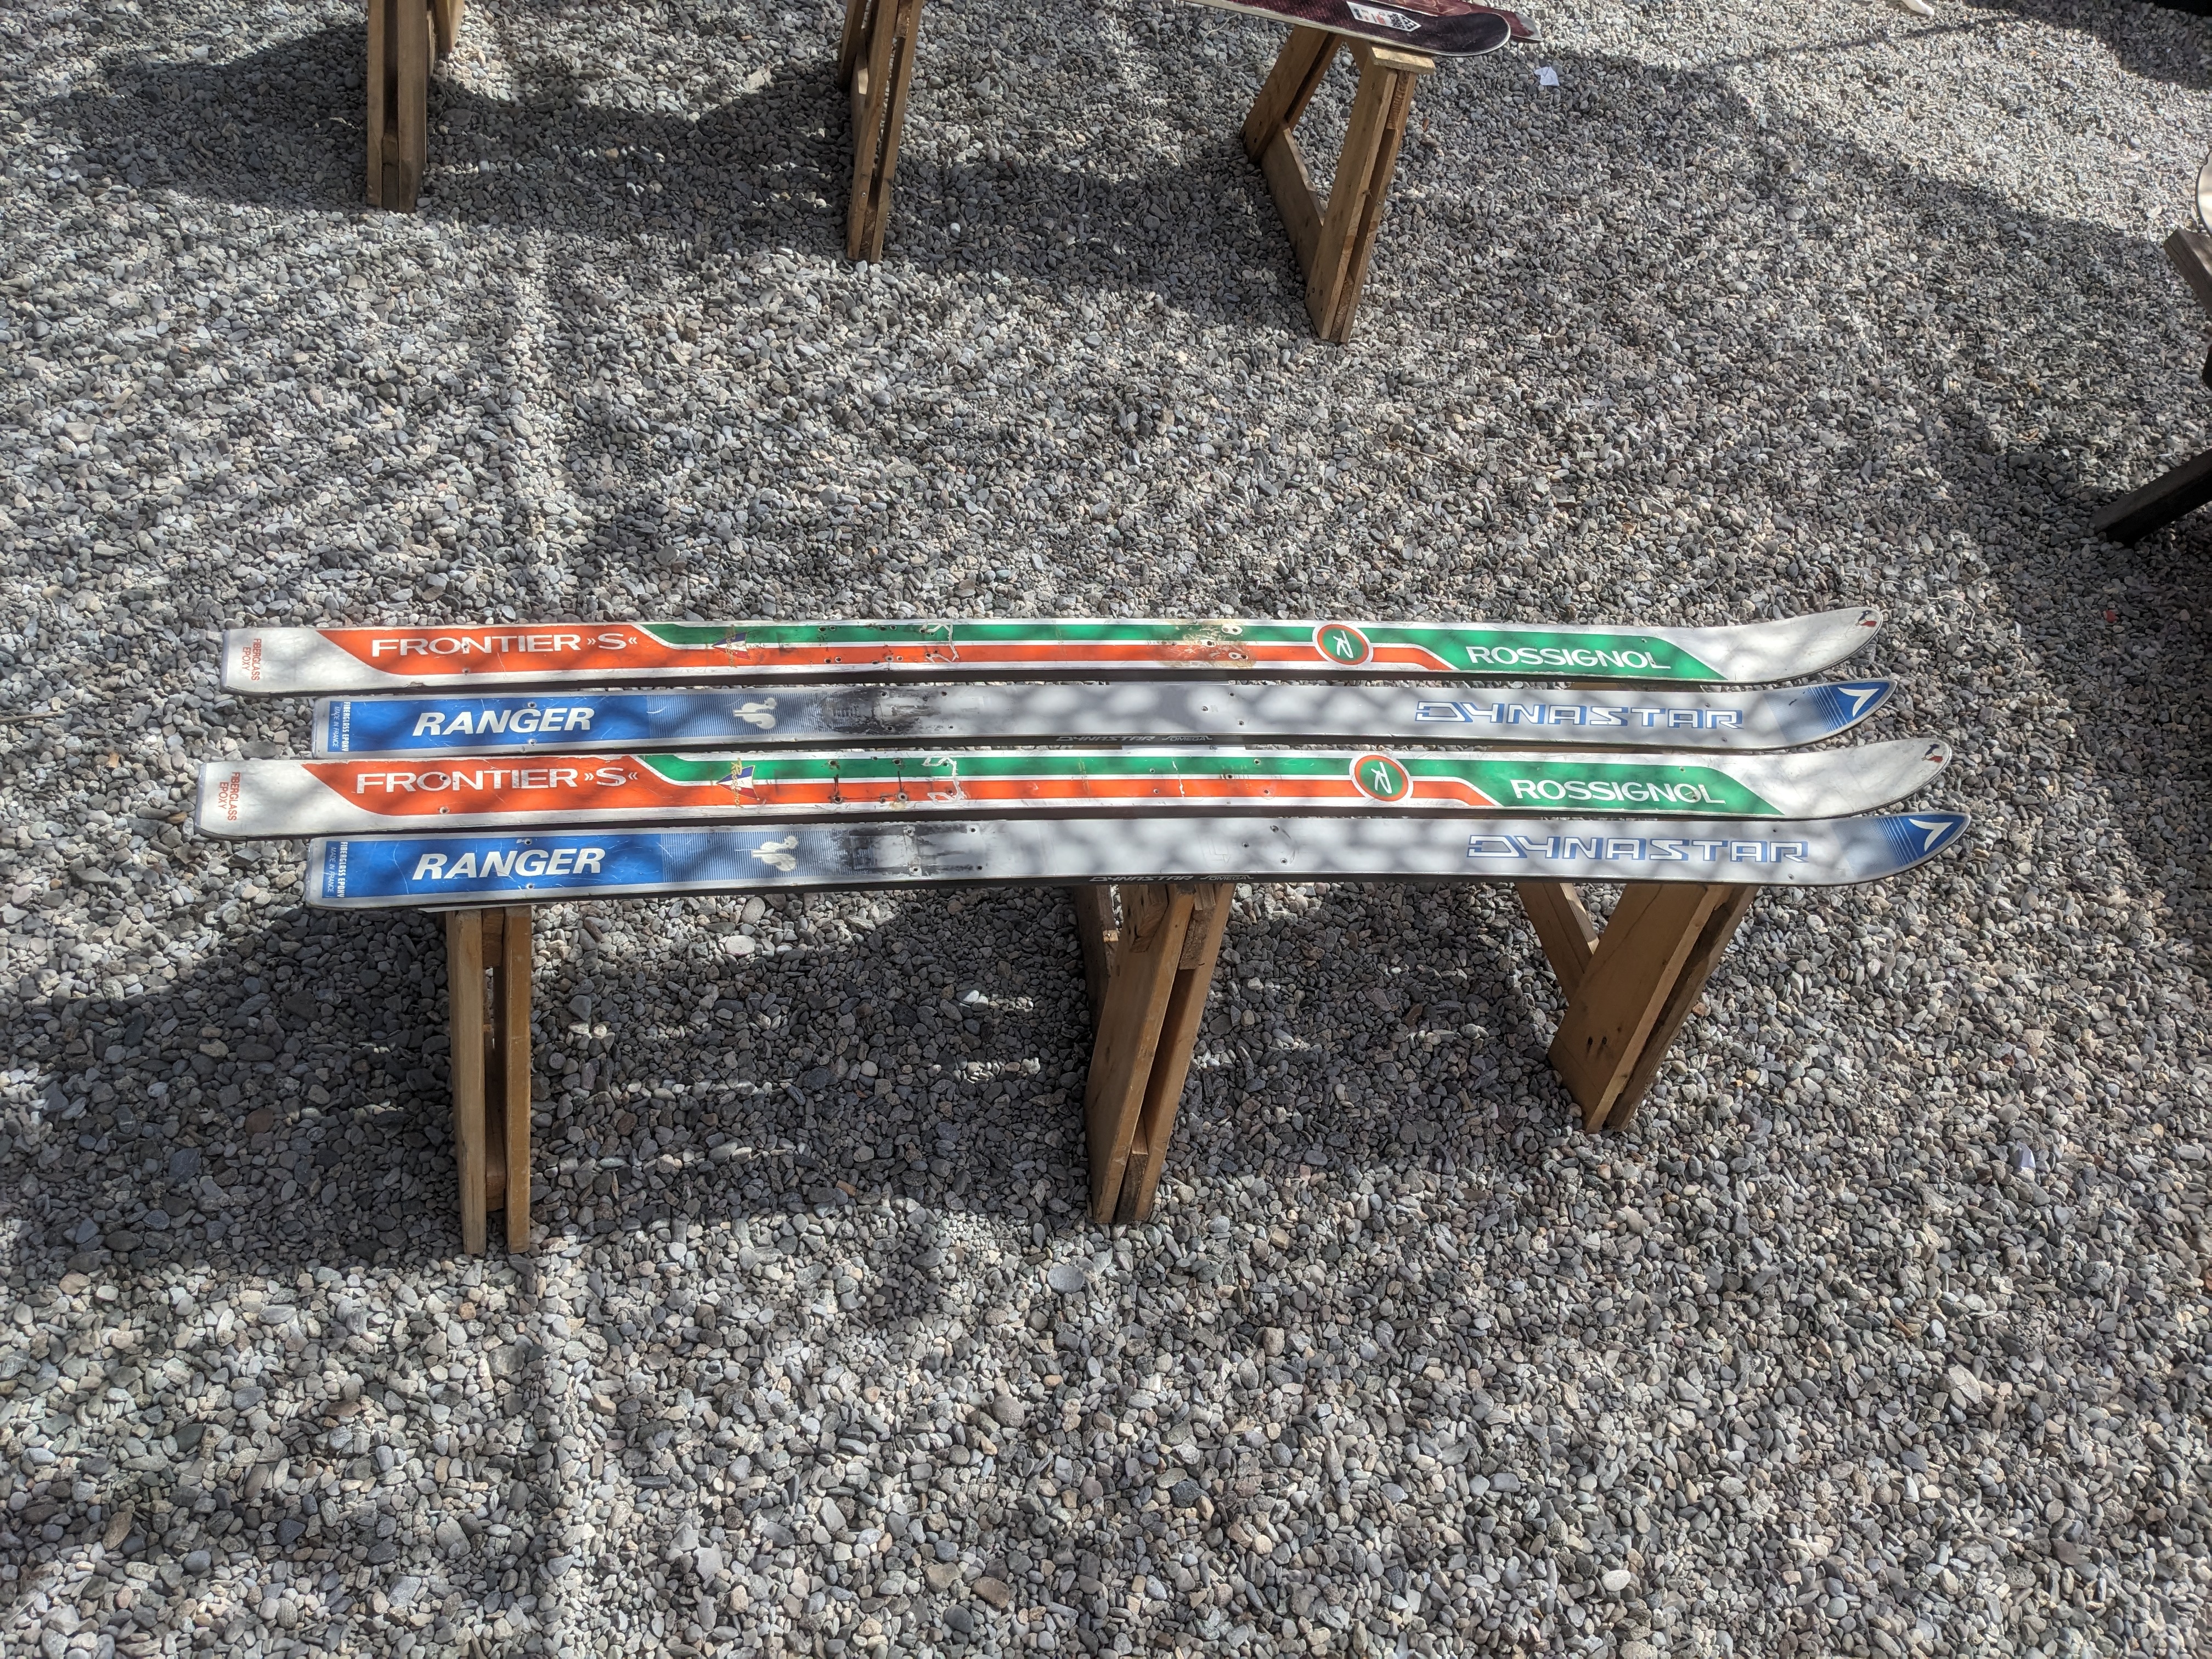
# Step 1: collect pallets and skis e.g. from a waste disposal centre / DIY shop. # Step 2: dismantle the pallets and ski bindings. NB: only use skis without visible bindings or screws. # Step 3: cut the boards to the required sizes. # Step 4: assemble the benches, finish by sanding down any rough edges for a cleaner finish. The bench has 3 legs (only 2 legs pose solidity problems as the skis are very flexible). You can attach between 4 - 6 skis to the bench: EITHER 4 skis in total - 3 for the seat +1 for lateral strength. OR 6 skis with 4 for the seat + 2 for lateral strength (see image below). Possible alternative: The skis on the seat can be replaced with a snowboard!
Description
Making a 4-5 seater bench from recycled skis
Vidéos
Recovery of pallets and skis
Plan this ahead of the workshop: skis can be collected from waste collection centres, and pallets from supermarket depots / DIY shops.
Dismantle pallets and remove ski bindings:
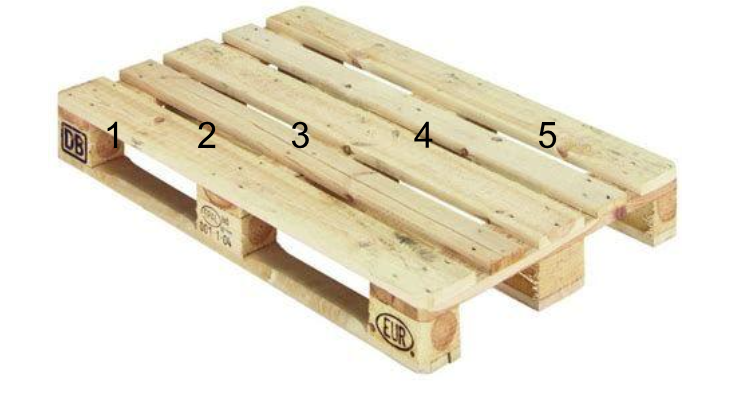
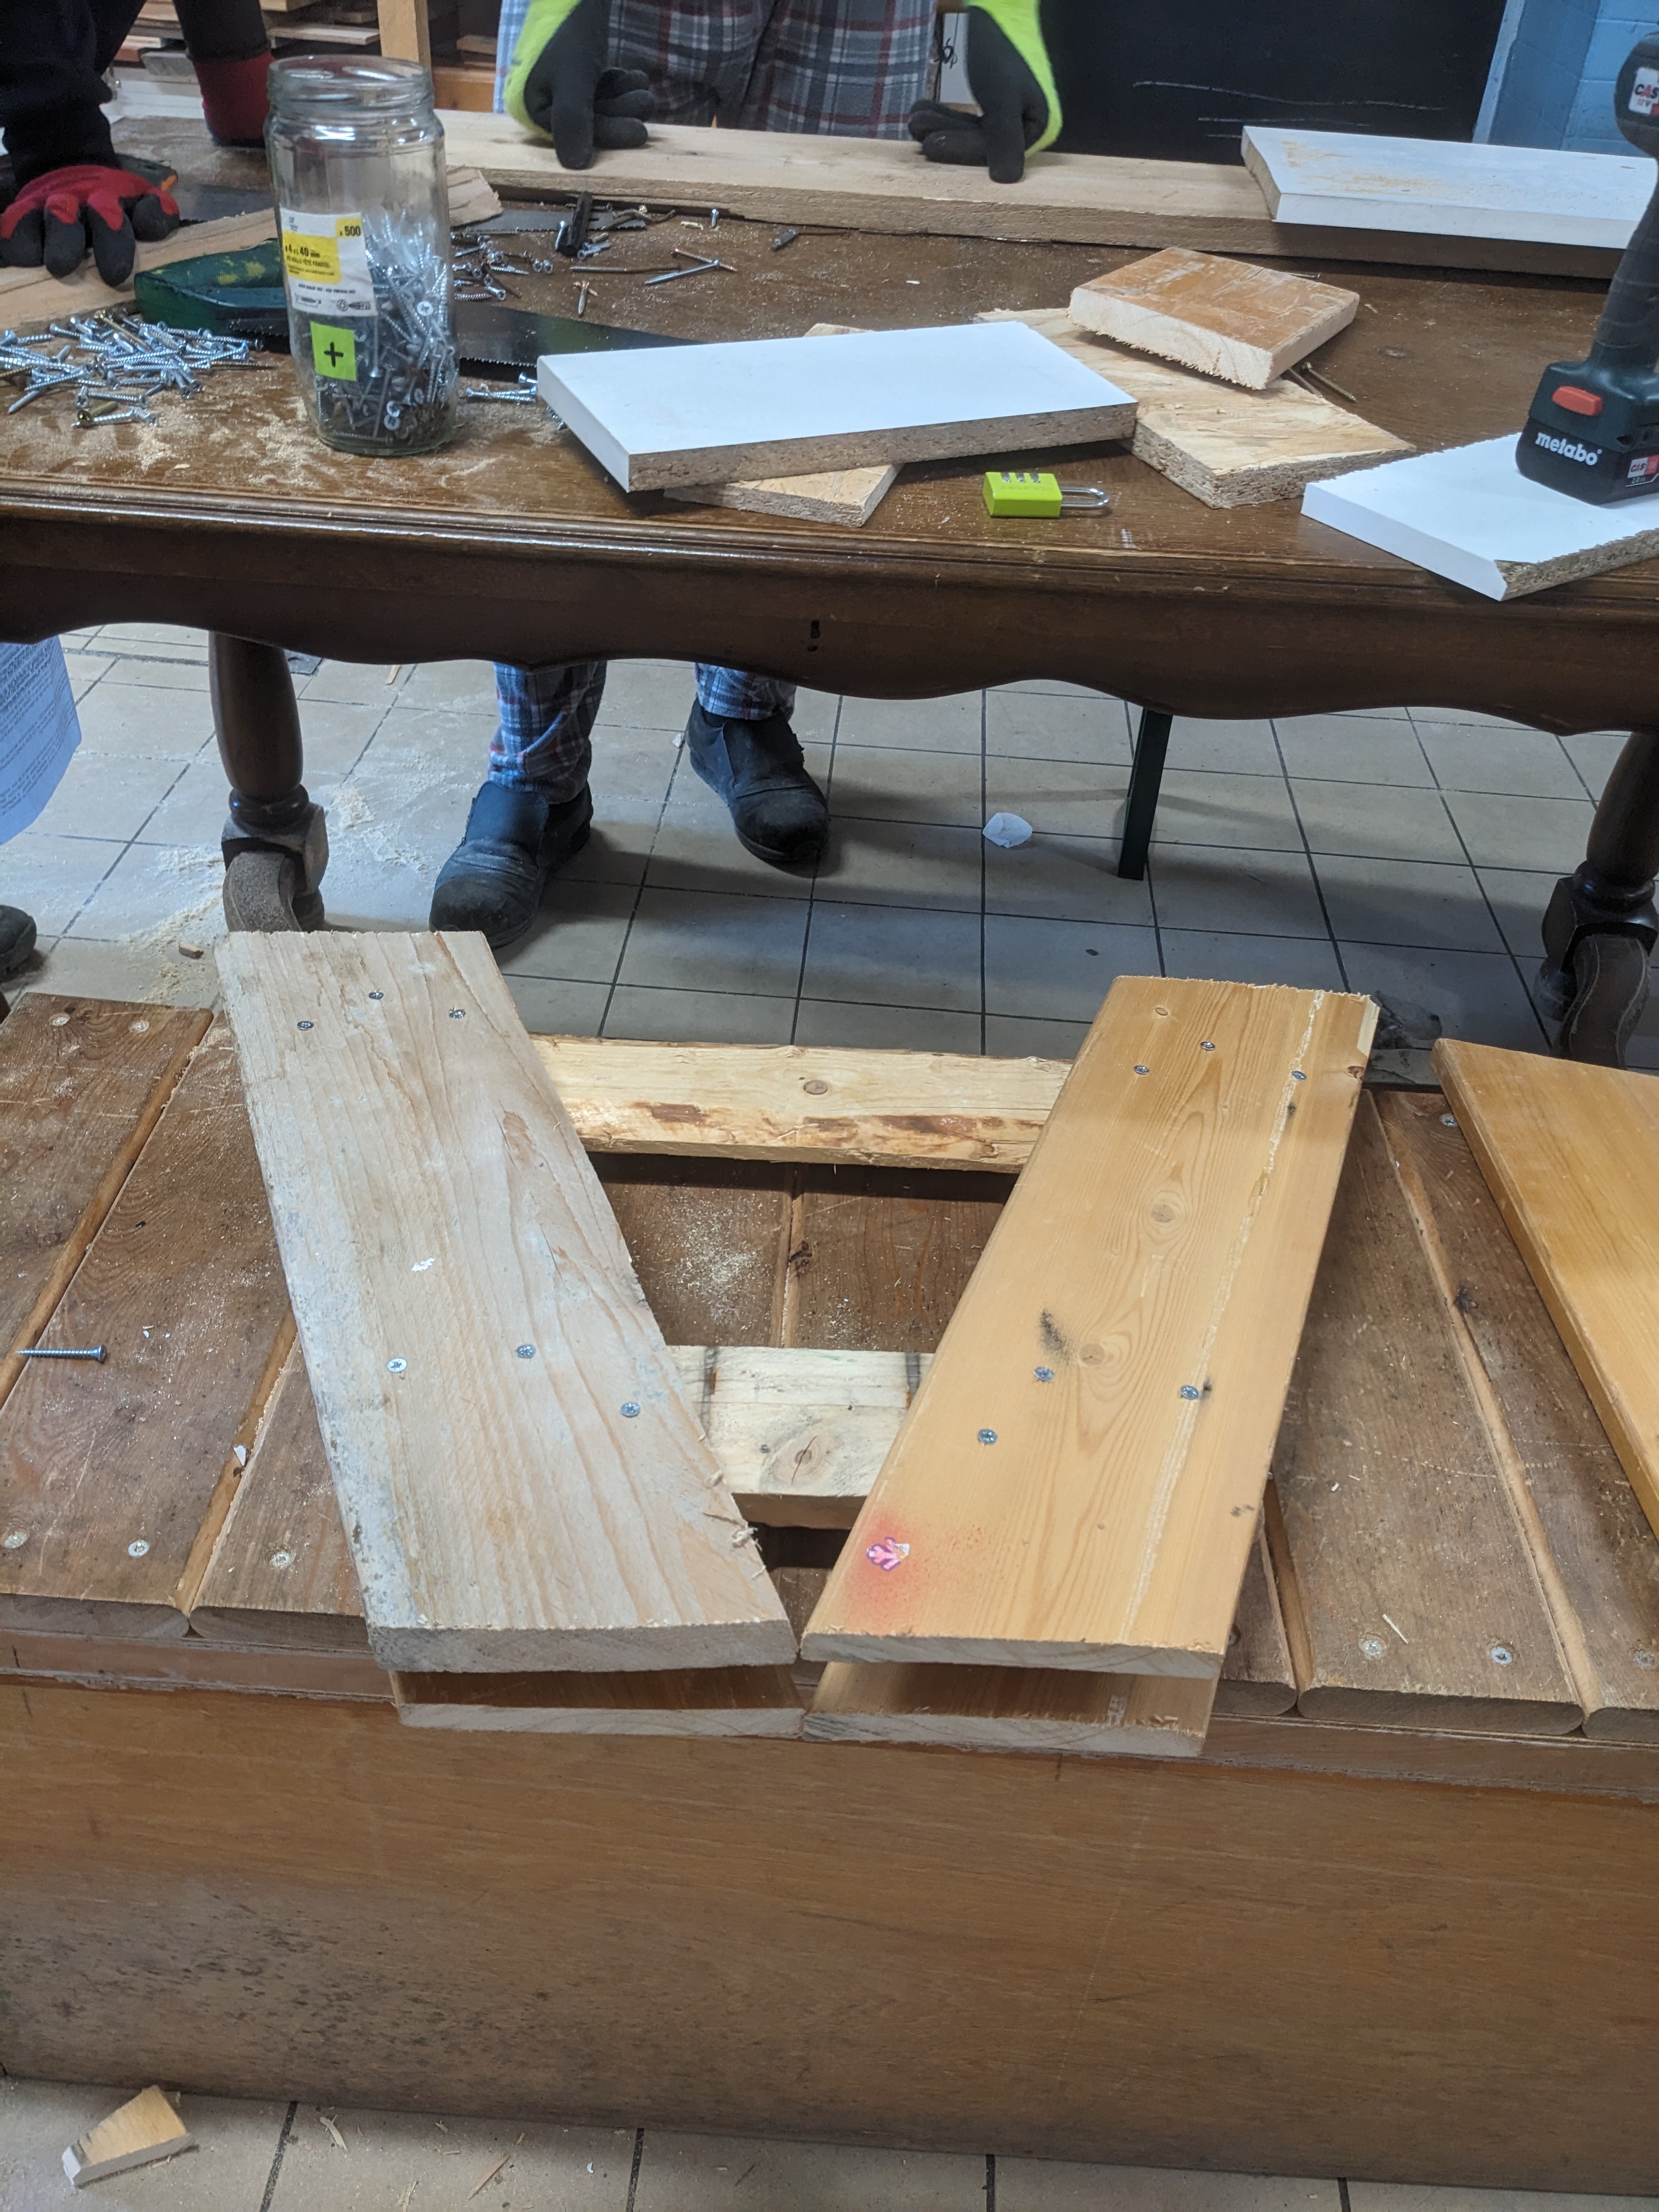
To dismantle a pallet, take it slowly and don't force it, otherwise you risk damaging the boards. Place the crowbar in the gaps, and tap the crowbar with the sledgehammer so that it fits into the gap, repeating the process in different places until you feel the boards coming loose. Note that if you break the ends of some of the boards, it's not a big deal, as some of them will be cut off later. Remove the following pallets: * Start with boards 2 and 4 from the top * Turn the pallet over and remove the blocks from planks 1, 3 and 5 * Remove the boards attached to the blocks * Tap the nails on boards 1, 3 and 5 to remove them. * Similar method on this tutorial (https://www.youtube.com/watch?v=tQnQkdUS3yo)
Cutting the boards :
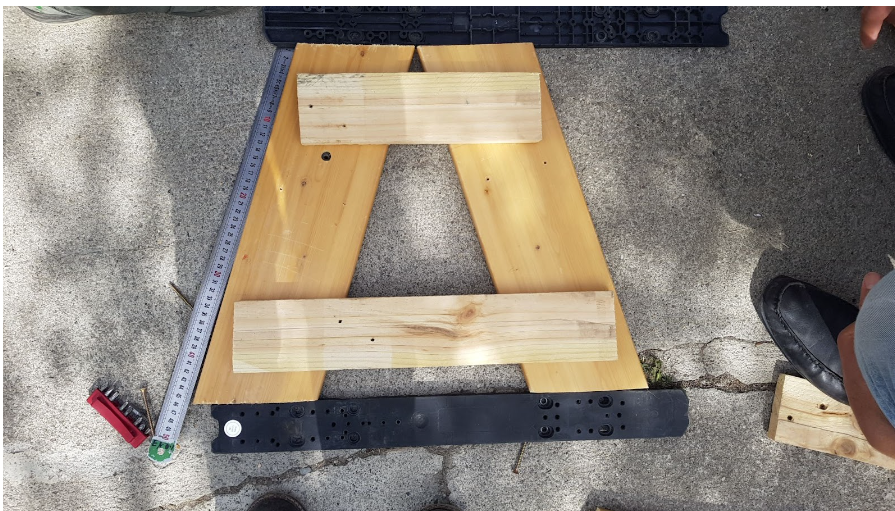
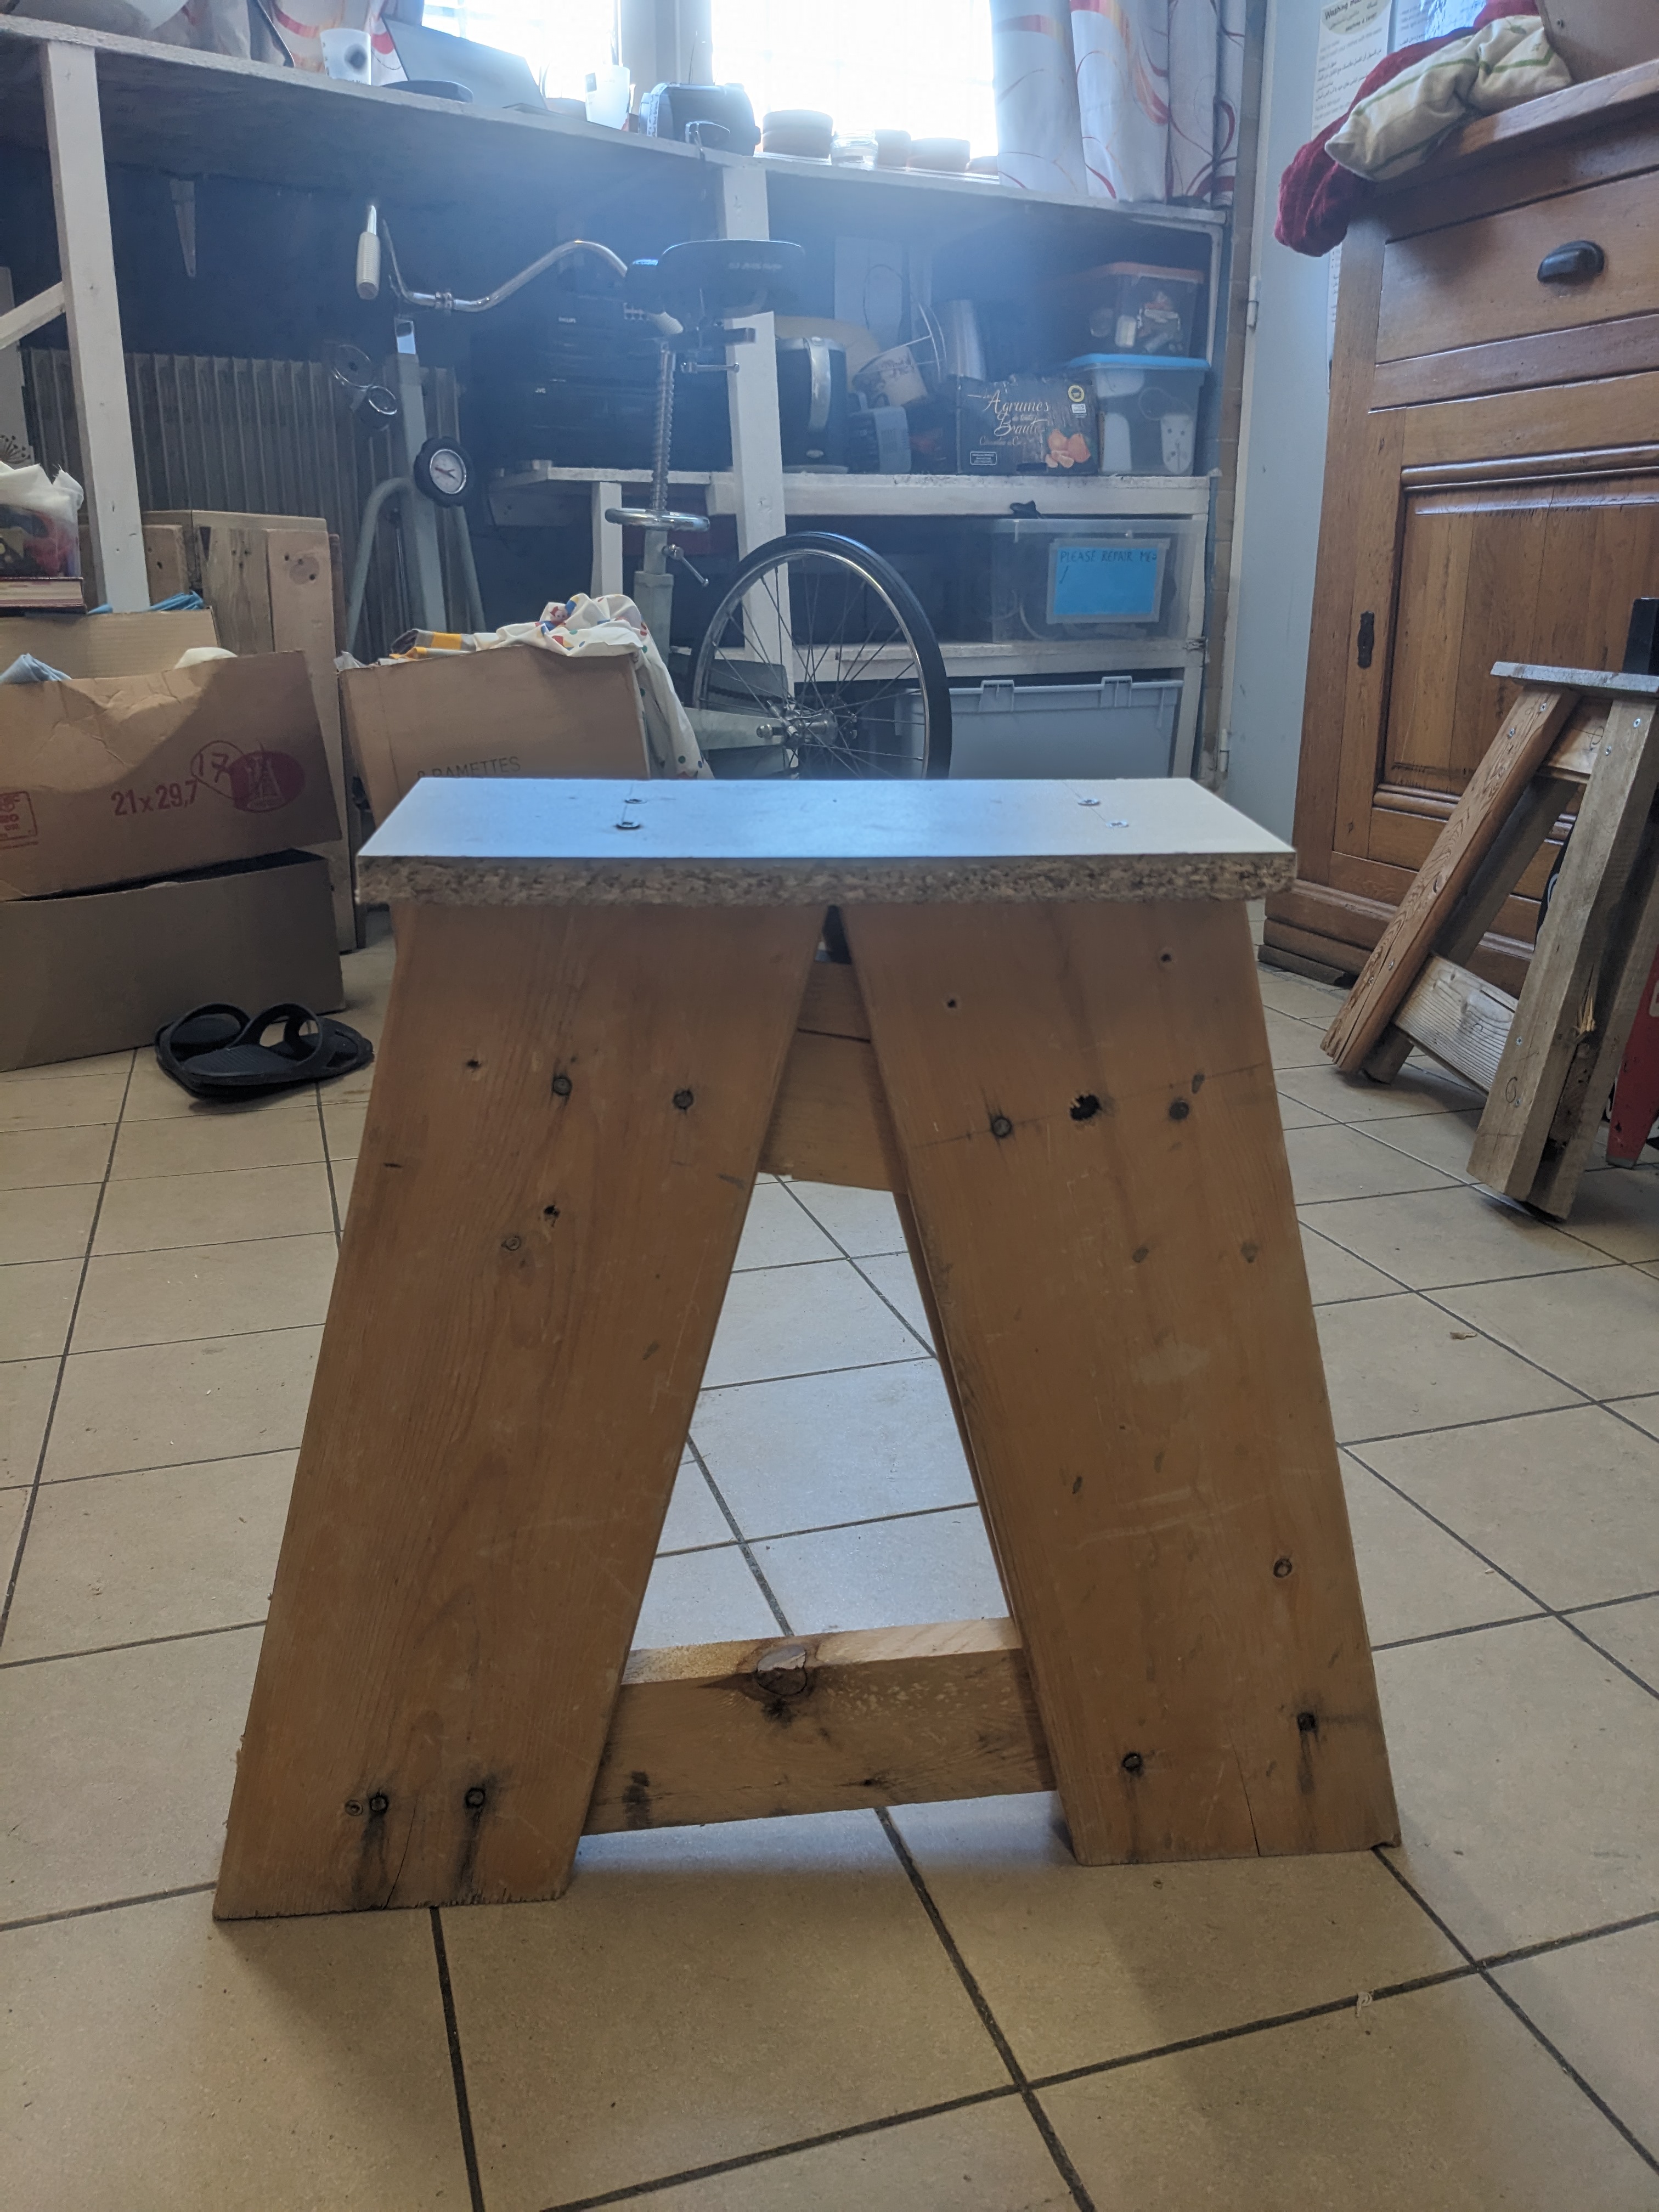
* Wide: For the vertical sections of the bench legs * Thin: The crosspieces of the bench legs Making a bench leg: * Small crossbar x2 ( Straight cut, length 30cm ) * Large crossbar x4 (Straight cut, length 45cm) * Support / stabilising crosspiece: 30x15 cm So for a bench (= 3 feet): * Small crossbar x6 (yellow in photo) * Large crossbar x12 (orange in photo) * Support crossbar x3 (green in photo)
Assembly of the bench legs
Step 1: Screw the small crosspieces onto the large front crosspieces Step 2: Screw the large rear crosspieces to the assembly (small crosspiece + large front crosspiece) to create the legs. Step 3: Screw the top crossbar onto the top of the bench leg
Assembling the skis on the legs
Step 1: Screw the centre skis onto the leg supports. Step 2: Then attach one side ski per side (~ 10 cm from the bottom)

← Retour au répertoire — Fiche originale sur wiki.lowtechlab.org ↗