Vélo-Blender/en-gb
Prototype — Difficulté : Moyen — Durée : 1 day(s) — Coût : 10 EUR — Mise à jour : 10 juin 2026 — 90 révision(s) — Licence : Attribution (CC BY)
Aires : Alimentation Energie — Contributeurs : EKO!
Fiche reformulée à partir du wiki Low-tech Lab : voir la fiche originale ↗
Versions de cette fiche : EN FR
Introduction
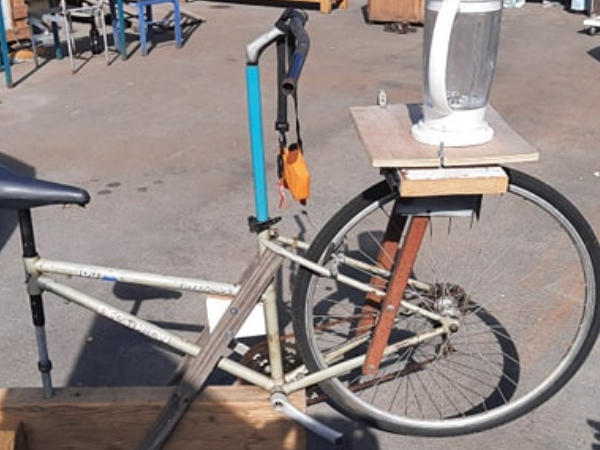
Reduce your environmental impact by decreasing your energy consumption, recycling/upcycling materials and keeping active to end up with delicious soups and smoothies. The organisation EKOPRATIK based in Reunion aims to promote ecology through pratical and user-friendly solutions. With this in mind, an R&D activity on Lowtech emerged, and the idea to build a bike blender took root.
Description
The bike blender that uses leg power to blend your smoothies!
Vidéos
Greasing
Grease the bike at the following points (saddle, handle bars, pedals)
Take the bike apart
#Get to know the parts of a bike #Taking apart the saddle: #*Undo the clamp #*Remove the seat post and the saddle #Disassemble the handlebars #*Remove the front wheel #*Remove the fork and the bracket by separating them #*(Need more photos / explanations ?) The fork won’t be necessary (we don’t keep the front wheel) #Remove What’s Not Necessary: #*Remove the front and rear brakes #*Remove the gears #*Remove the cables <br />
Turn the bike upside-down (step not carried out)
Steps we didn't manage to complete because the bike was too rusty * Take off the pedals * Reverse the derailleur * Reverse the back wheel
Prepare the blender
* Remove the base * Keep the disc * Keep part of the base for mounting (Photos and detailed explanations to follow with next prototype)
Create the base
# Take a block of wood #* Long enough to prevent the pedals touching the ground #* Narrow enough to allow the pedals to turn #* Long enough to reach from the pedals to the saddle mount # Place wedges at the front and back to stabilise it
Attach the bike frame to the mount - saddle side
* Drill a hole in the mount to match the diameter of the seat post (saddle side) so that the frame rests on the edge of the base at the pedal side * Insert the seat post into the base (diameter smaller than the head tube) * Drill holes in the base and the mounting post * Secure it to the base (nail/screw) * Place the frame on the base ** head tube on the post ** frame (pedal side) at the edge of the base * Drill through the head tube and the fixing post at one point
Attach the bike frame (handlebar side) to the base
*Place a small wooden slab in the top section of the frame (same width / slightly narrower than frame tubes) *Take 2 wooden runners (thick + long enough to span from the base to the frame struts diagonally) *Secure the runners to the base: **Drill 4 holes in the runners and the base (2 per strip) **Screw them in place *Secure the runners to the board inside the frame **Drill 2 holes that pass through both runners and the central board **Secure everything with bolts and nuts (+ washers if needed) *Secure the two runners together with a screw, behind the saddle tube These brackets are used to ‘secure’ the bike to prevent it from rocking whilst pedalling
Secure the bike frame to the base (optional extra)
(Also, if there is a tube between the two seat stays, just behind the seat tube) Attach the frame to the front of the mount * Drill a hole in the tube mentioned above * Attach a “flat bracket” * Screw the “flat bracket” into the base (1 or 2 screws) The bike is now properly fixed onto the mount
Fix the handlebars and the saddle
# The saddle * Drill several holes along the seat post * Use a nail or a screw to block These holes help adjust the saddle height to suit the rider <br /> # The handlebars: *Attach a tube to the post (diameter smaller than the seat tube) *Position it inside the seat tube *Secure it with a clamp The tube needs to be long enough to adjust to the rider's height <br />
Make the blender support
# bike side Attach 2 bars on either side of the bike frame * Drill holes in the wires and bases * Drill holes in both bars * Secure the bars using bolts + nuts # "blender side" * Use bits of wood + brackets (drawer runners) * Fit brackets so that they can be attached to the two bars attached to the frame (take care with positioning) (computer power supply unit cut in half) This bracket enabled us to level the blender mount <br />
Attach the 2 sections of the mount
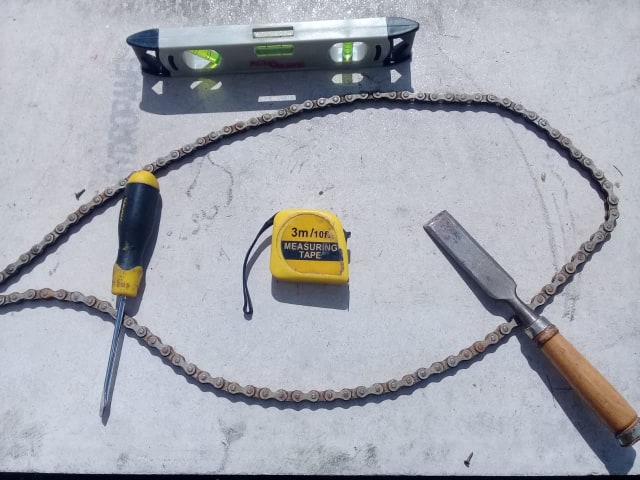
Attaching the mount * Position the mount so that it is as flat/level as possible (Step correction) * Unscrew the drawer runner (leave one fixing point in place) * Find a bar that is long and wide enough to span both wooden blocks * Secure the bar to the flatter of the two blocks (using a spirit level + a clamp) * Level the second block using a second clamp * Reattach the drawer runner
Position the blender slab
# Make the blender mounting slab/plaque *Cut a hole in the board to insert the rotating mechanism *Drill holes in the designated positions to screw the blender in place (Corrected step: use a food-grade surface: see last photo)
Fit the bearing
*Fit the skate wheel *Double check that it makes contact with the bicycle wheel The photos show the various rolling tests: a piece of inner tube, a cork + a skate wheel
Positionning the blander slab/plaque
* Fit a screw for the vertical cladding (on the left) To ensure the blender base is held securely against the mount * Fix 2 brackets for horizontal adjustment (on the right) To ensure that the bearing is pressed firmly against the wheel Attaching the slab to the blender Notice the attachment to hold the slab in place (on the left) Explanation: * The slab can be removed and cleaned easily Notice the two adjustment brackets (on the right) Explanation: * The slab can be moved sideways to better align with the rotation of the bike wheel


← Retour au répertoire — Fiche originale sur wiki.lowtechlab.org ↗